Tools
Free printable clay cat template for handbuilding
Pick the kind of cat you want to make, or match your own. The template redraws at actual size, ready to print and build from.
A ready-to-print PDF of the cat shown below with its standard settings and 12% shrinkage, on US Letter. Print it at 100% (“actual size”). To change the cat or the shrinkage, use the options below and print from this page instead.
Building it
- Body: roll two balls the size shown and pinch each into a pot. Cut the gauge from card and hold it against each pot as you pinch, until both match. Score, slip, and join the rims into an egg.
- Stand the egg on its wider end and tap it gently on the table so it sits flat.
- Head: the same way, with the smaller gauge, joined into a ball. Join it to the body, leaning a little forward.
- Add the haunches, legs or paws, and ears, then wrap the tail around the feet and press it to the body along its whole length. Score and slip every join.
- Leave a small hidden hole (under the chin or tail works) so air can escape in the kiln.
- Check your cat against the side view as you go, then let it dry slowly under plastic.
About this template
This is a starting point we drew for our own handbuilding, not a pattern from a book. The builds follow the body types cat shows use: stocky like a British Shorthair or Persian, medium like most household cats, and slender like a Siamese. Mix them with any head, ears, and tail to get close to a cat you know.
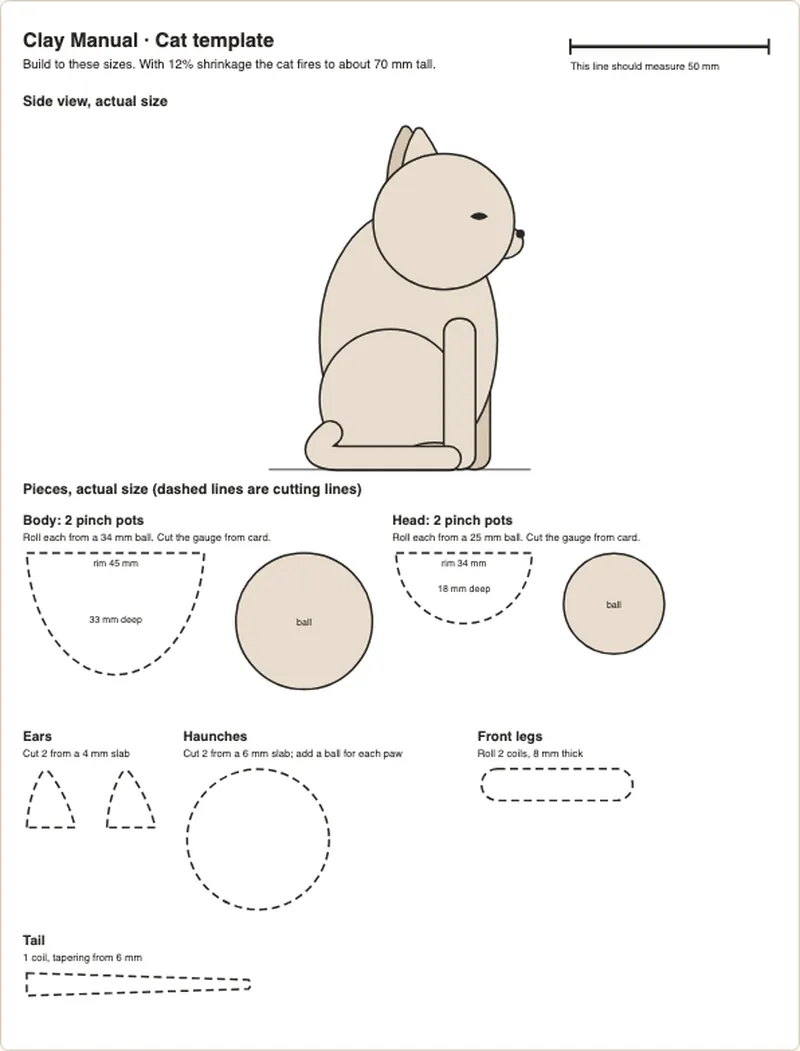
The tail always wraps around the feet. A tail sticking out is the first thing to snap while the clay dries, and wrapping it is how most ceramic cats are made. The side view shows the tail short because it curves around the front; roll the coil to the length on the pieces list.
The steps for joining pieces like these are in how we made a small clay dog, and the shrinkage number the template asks for is explained in our shrinkage notes. There is also a dog template. Tell us what other animals you would like.