Christmas · seasonal project
Clay & Forming · How-to
How to Make Clay Christmas Ornaments, Kiln-Fired or Air-Dry
13 min read
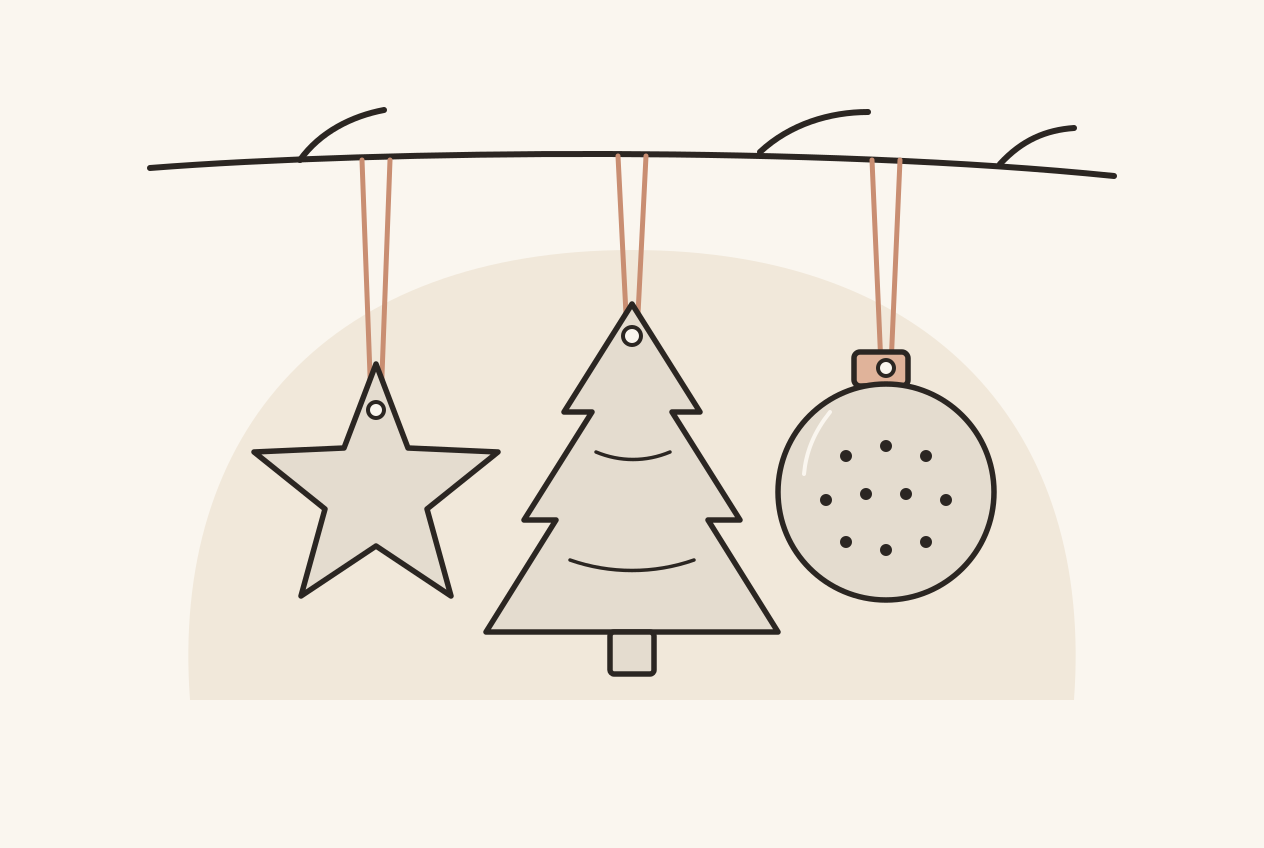
A flat clay ornament is a good first slab project. You roll one even slab, cut out a few shapes, make a hole for the ribbon, and let them dry flat. You can make them from the clay you use in class and have them fired and glazed, or from air-dry clay at the kitchen table and paint them.
To make the cutting easy, we drew a free printable template with five shapes: a star, a tree, a snowflake, a gingerbread person and a bauble, each with a mark for the hanging hole.
We haven’t made this set ourselves yet, so the steps below come from clay and glaze makers’ own project pages, two university ceramics courses, articles from Ceramic Arts Network and Ceramic Industry, and Tony Hansen’s Digitalfire notes, which we name as we go, plus general studio practice where we say so.
Short answer
How do you make clay Christmas ornaments?
- Print the template at 100% (actual size) and check the 50 mm line. Use the kiln sheet for clay you will fire and the air-dry sheet for air-dry clay.
- Roll an even slab between two guide strips, about ¼ inch (6 mm) thick for kiln clay or about 1 cm for air-dry clay. Roll it on the board it will dry on, so you don’t have to lift it.
- Lay the paper shapes on the slab about 1 cm apart and cut around them with a needle tool or a craft knife. Before you peel the paper off, prick through the centre of each hole mark into the clay.
- Push a drinking straw through the pricked spot. The hole shrinks with the clay, so it starts out bigger than the ribbon needs.
- Dry them flat and evenly: leave them where you cut them until they are firm, then on a rack so air reaches both sides.
Kiln clay then goes to your studio for a bisque firing, a coat of glaze with the back wiped clean, and a glaze firing. Air-dry ornaments are painted at home, sealed if you like, and stay indoor decorations.

Which version should you make?
- Kiln-fired: use the clay your studio sells and fires. Clay King, a ceramics supplier, describes the order: a bisque firing, then another firing after glazing. That needs a kiln, so most beginners take their pieces to a class or a community studio. Every ornament has to be completely dry before its first firing, and then it waits for two firings at your studio. Ask when their next bisque and glaze firings are before you start. If the glazed ornaments won’t be back before Christmas, the air-dry version is the one to make this year.
- Air-dry: use an air-dry clay such as DAS, which FILA says hardens in air without baking. You don’t need a kiln, and Mont Marte, which makes an air-dry clay, says not to bake it in an oven or kiln. Mont Marte says air-dry clay typically takes 24 to 48 hours to dry, so you can be painting within a few days. Our air-dry clay guide compares three clays.
The steps are the same up to drying. The kiln-fired finish is in step 6, and the air-dry version has its own section after it.
What you need
- The printed template (step 1).
- Clay: kiln clay from your studio, or an air-dry clay.
- A rolling pin and two guide strips of the same thickness, such as two flat wooden strips or dowels.
- A board or a piece of drywall to roll on and leave the ornaments on. For air-dry clay, a sheet of wax paper.
- A needle tool or a craft knife, a drinking straw, and a small sponge. You can cut your own sponge from a car sponge.
- A wire rack, such as a cake-cooling rack.
- Thin ribbon, twine or cord, for the end.
- For kiln clay, your studio’s glaze. For air-dry clay, acrylic paint and, if you like, a sealer.
1. Print the template
Kiln clay template (12% shrinkage), US Letter 2 pages. Print at 100% (actual size) and check the 50 mm line measures 50 mm.
Kiln clay template (12% shrinkage), A4 2 pages. Print at 100% (actual size) and check the 50 mm line measures 50 mm.
Air-dry clay template (0% shrinkage), US Letter 2 pages. Print at 100% (actual size) and check the 50 mm line measures 50 mm.
Air-dry clay template (0% shrinkage), A4 2 pages. Print at 100% (actual size) and check the 50 mm line measures 50 mm.
Print at 100% (“actual size”), not “fit to page.” Measure the 50 mm line on the sheet. If it isn’t 50 mm, the printer scaled the page, and every shape and hole will be off by the same amount.
The five finished ornaments are each about 75 to 80 mm tall, with a hanging hole about 5 mm across.
Why there are two sheets. Clay shrinks as it dries and again in the kiln. Hansen puts the drying shrinkage of a typical plastic pottery clay at about 6%, before any firing, and gives one worked example where the total comes to 12.5%. So the kiln sheet is drawn at 12% shrinkage: each outline is the finished size divided by 0.88, which makes the shapes about 85 to 90 mm tall on the paper. At 12% they should shrink to about 75 to 80 mm by the end of the glaze firing.
Every clay is different, so check your clay’s product sheet or measure its shrinkage. A clay that shrinks more than 12% gives slightly smaller ornaments, and one that shrinks less gives slightly bigger ones. For the shape that hardly matters. For the hanging hole it does, which is why step 4 starts the hole bigger than the ribbon.
The air-dry sheet is drawn at 0%, so its outlines print at the finished size. Air-dry clays still shrink a little: Creative Paperclay lists about 5% as it dries, so expect air-dry ornaments to come out slightly smaller than the paper.
Cut the shapes out of the paper along their outlines. If you plan to make several sets, trace them onto thin card, such as a cereal box, which holds up better on damp clay.
2. Roll an even slab
Lay your two guide strips on the board, one each side of the clay, and roll so the rolling pin rides on the strips. The slab comes out the same thickness all over. Laura Reutter, a tile maker writing for Ceramic Arts Network, rolls her tiles with wooden spacers or dowels under the rolling pin. The University of the Pacific ceramics course says to keep clay the same thickness to cut down stress in drying and firing.
For kiln clay, Mayco’s cookie-cutter ornament project rolls the clay ¼ to ½ inch thick. We suggest the thin end, about ¼ inch (6 mm), so the ornaments stay light enough to hang from a branch. For air-dry clay, see the air-dry section below.
Two things from Reutter help a slab stay flat:
- Roll it where it will dry. She rolls straight onto drywall and doesn’t move, lift or turn the slab afterwards. If you move the soft clay, she says, its “plastic memory” kicks in and it may warp, bend or curl during drying and firing.
- Don’t make it wet. She likes her clay on the dry, stiff side, because too much water makes it dry slowly and promotes warping. Skip the slurry on the surface.
If you use drywall for kiln clay, use a piece with its paper face whole, don’t scrape it, and keep crumbs from its cut edges out of your clay. Drywall has a plaster core. Jeff Zamek, writing in Ceramic Industry, says lime contamination in moist clay comes most often from plaster wedging tables and plaster bats, and that a lime nodule left in the fired piece can later swell and crack it.
If you want a pattern, press it into the slab now, before you cut, as Mayco’s project does.
3. Trace and cut the shapes
Lay the paper shapes on the slab about 1 cm apart. Hold the needle tool or knife upright and cut straight down around each outline. The small curves drawn into the inside corners are part of the outline, so follow them rather than cutting a sharp corner. Then lift away the spare clay from around the shapes, rather than lifting the shapes out of the slab.
Before you peel off the paper, prick straight down through the centre of each hole mark with the needle tool, so the clay keeps the spot. Then peel the paper off.
Leave the ornaments where they are.
4. Make the hanging hole
Make the hole now, while the clay is still soft. On the sheet, the hanging hole is the small circle with a cross through it (⊕). Mayco’s and Crayola’s ornament projects both make the hanging hole with a drinking straw, and Crayola puts it close to the top. Use a straw about the size of the circle on the sheet. Centre it on the spot you pricked, push it straight down, give it a small twist, and lift it out with its plug of clay. If the plug stays behind on the board, lift it out with the needle tool. Keep the hole where the mark is, with clay all the way round it. A hole right at the edge leaves a thin bridge that can snap.
Make the hole bigger than the ribbon needs, for two reasons:
- It shrinks with the clay. On the kiln sheet the hole mark is about 5.7 mm across, so that after 12% shrinkage it ends up about 5 mm across.
- Glaze can narrow it. A coat of glaze inside the hole takes up some of that room, so step 6 clears it out.
If your ribbon or cord is thicker than that, use a wider straw. A hole a little too big still hangs; one too small won’t take the ribbon. The ribbon goes in at the very end, after the last firing, or once the paint and sealer are dry.
Once the ornaments are leather-hard, soften the cut edges with a slightly damp sponge, as AMACO’s slab lantern lesson does. Pay most attention to the inside corners: between the snowflake’s arms, at the steps of the tree, at the gingerbread person’s neck and under its arms, and where the bauble’s cap meets the ball. Hansen says drying cracks like to start inside sharp angles, and that rounding them at leather-hard denies a crack a place to start.
5. Dry them flat
A flat piece warps or cracks when one part dries ahead of another. Hansen says it is the unevenness of drying, not its speed, that cracks ware, and that no part of a piece should get far ahead of another.
Reutter leaves her wet tiles on the drywall for 8 to 12 hours. Drywall pulls a lot of water out of the clay, she says, and the tiles stiffen up. Then she moves them to a rigid metal rack: because air reaches every side, they dry evenly and don’t warp. Carol Harris, writing in Pottery Making Illustrated, dries her large texture plates slowly between two sheets of drywall to stop them warping, and lets her finished ornaments, which are hollow, dry on a wire rack.
So leave the ornaments on their board until they are firm enough to pick up without bending, then move them to a wire rack so air reaches the back as well as the front. If your room dries things quickly, cover them loosely with plastic for the first day; Hansen covers drying ware with cloth and plastic. Our notes on why clay cracks while drying go into more detail.
Once they are bone-dry, they are at their most fragile. Pick each one up by the middle, not by a star point or a snowflake arm.
Let kiln-clay ornaments dry completely before they go anywhere near the kiln. Mayco’s project says the same.
6. Bisque, glaze and fire (kiln clay)
When the ornaments are completely dry, your studio bisque fires them. Then you glaze them and they go back for a glaze firing.
Keep glaze off the back. Michael T. Schmidt’s glazing handout for a ceramics course at Valdosta State University says any surface your work touches in the kiln, including the shelves and kiln furniture, should be left unglazed, because the glaze melts and sticks to it. A flat ornament lies on its back, so glaze the front and wipe the back clean with a damp sponge. Schmidt also leaves a bare margin at the foot of a pot because glazes can run as they melt, so wipe a little way up the edge on the back, too.
Clear the hanging hole. Push a cotton swab or the needle tool through it after glazing, so glaze doesn’t narrow or seal it. Gare, a ceramics supplier that hangs ornaments on a rod in the kiln, cleans the hole after dipping so the glaze can’t melt onto the rod.
If you want glaze on both sides, the ornament has to be fired off the shelf. Mayco stilts its cookie-cutter ornaments, made in low-fire earthenware, for the glaze firing, Gare shows flat ornaments hung on a rod between two kiln posts, and Harris hangs hers on a bead bar. That needs the right kiln furniture for your clay and the person who loads the kiln, so ask your studio whether they do it before you glaze the back.
Your studio, or whoever fires the kiln, decides how the ornaments are fired. We don’t give firing temperatures, kiln schedules or glaze chemistry here. Follow your studio and the glaze label.
The air-dry version
Use the air-dry sheet, which prints at the finished size.
- Roll the slab on wax paper, as Crayola’s air-dry ornament project does, between your guide strips. Mont Marte says not to roll air-dry clay too thin and suggests about 1 cm, at an even thickness.
- Cut the shapes and make the hole the same way as steps 3 and 4, pricking the hole centre before you peel off the paper. Crayola uses a drinking straw for the hole, close to the top.
- Dry it slowly and flat. Mont Marte says to dry air-dry clay gradually at room temperature, away from direct heat and sunlight, and suggests turning a piece over at about 24 hours so it dries evenly, or drying it on a cake-style rack. Creative Paperclay says small, thin pieces may dry overnight and thicker ones can take several days.
- Paint it once it is completely dry. Mont Marte suggests acrylic paint; Crayola paints its ornament with watercolors.
- Seal it, if you like. Creative Paperclay recommends a spray lacquer or a brush-on varnish, and FILA makes VerniDAS, a glossy protective varnish for DAS pieces. FILA says VerniDAS is solvent based, so follow its label, including anything it says about ventilation and about use by children.
Clay King notes that air-dry clay isn’t waterproof, so keep these ornaments indoors and away from water. Our air-dry clay guide has more on the three clays we looked at.
If something goes wrong
- The ornament curled or warped. It was probably moved while it was soft, or one side dried faster than the other. Next time leave it on its board until it is firm, then dry it on a rack. Turn air-dry ornaments over at about 24 hours.
- A crack opened while it dried. One part got ahead of another, often at an inside corner. Even thickness, even drying and softened inside corners are the fixes; see why clay cracks while drying.
- A point or arm snapped off a dry ornament. Bone-dry clay is fragile. Hold the next one by the middle.
- The ribbon won’t go through the fired hole. The hole shrank more than expected, or glaze narrowed it. Use a wider straw next time, and clear the hole after glazing.
- The back stuck to the kiln shelf. There was glaze on the back or the bottom edge. Tell your studio, and wipe the back and the edge clean on the next one.
More seasonal clay
For a bigger seasonal piece, our clay jack-o’-lantern is made from two pinch pots, with its own printable face template. If you would like another small template project, try the clay dog.
Sources (20)
: Digitalfire, Tony Hansen, University of the Pacific (Jessica Fong, Ceramics course on Humanities LibreTexts), AMACO (American Art Clay Co.) and more
- Drying Ceramics Without Cracks — Digitalfire, Tony Hansen. Ware shrinks when it dries; Isolate the stage where drying gradients are introduced; Give consideration to each type of piece; Clay is composed of microscopic flat crystals; Conclusion; and the picture notes on mugs, handles and foot rings. Supports: Hansen says it is the unevenness of drying, not its speed, that makes ware crack, and that at no time should any part of a piece be significantly ahead of another. A moisture spread introduced early (for example by an unshielded draft, or ware left out too long after forming) tends to remain, and in one of his examples covering mugs with cloth and plastic after the rims had stiffened did not save them. He recommends covering ware with cloth and plastic, waxing or wrapping handles so they keep pace with the body, slowing fast-drying sections with wax resist or latex at leather-hard, turning bowls over as soon as possible, even wall thickness with bases trimmed to the same thickness as the walls, avoiding sharp concave angles, and compressing the bottoms of wide thrown pieces to reduce drying stress (while saying even thickness and even drying, not compression, are the key). His conclusion: take cracked ware seriously, because a few cracked pieces can reveal a flawed process. The article gives no method for repairing a crack that has already opened. This is a technician's published explanation, not a test run for this site.
- Drying Crack — Digitalfire, Tony Hansen. Glossary text and picture notes on S-cracks, handle joins and large plates. Supports: Hansen says evenness matters more than drying speed and that fast-yet-even drying gives fewer cracks than slow-but-uneven drying. He says drying cracks like to start inside sharp acute angles, so rounding those angles at handle joins while the clay is leather-hard denies a crack a place to start, and that thinner, more even walls, better wedging and more even drying mean fewer cracks in large plates. He says most shrinkage happens as the first water is released, and that when one part dries well ahead of a neighboring part the stiffer part cannot shrink with the softer one. The entry describes S-cracks growing suddenly near the end of drying. It does not explain how to repair a crack that already exists.
- Drying Shrinkage — Digitalfire, Tony Hansen. Opening glossary definition and the total-shrinkage example. Supports: Hansen says clays used in ceramics shrink when they dry because of particle packing as inter-particle water evaporates, and that excessive or uneven shrinkage causes cracks. He says a typical plastic pottery clay shrinks about 6% in drying, that highly plastic bodies can shrink up to about 7.5% before drying cracks become difficult to avoid, and that shrinkage can be reduced to 5% or below before plastic bodies become too difficult to form. He notes dry and fired shrinkage cannot simply be added: in his example 6.25 dry plus 6.66 fired would be 12.9, whereas the actual total shrinkage is 12.5%. This is a technician's published explanation, not a measurement for any one clay and not a test run for this site.
- 4.4: Advanced Hand-building Techniques — University of the Pacific (Jessica Fong, Ceramics course on Humanities LibreTexts). Armatures, burnout and press-mold sections. Supports: The course says to keep the clay's thickness consistent to minimize stress during drying and firing, to carefully remove a hard armature if it is not designed to be left in during firing, to make vent holes so trapped air or moisture can escape, and to let a sculpture dry slowly and evenly. It does not describe a ghost and gives no wall-thickness figure.
- Lanterns To Light — AMACO (American Art Clay Co.). Lesson plan steps for a textured slab lantern. Supports: The lesson rolls slabs between 1/4 and 3/4 inch thick, cuts openings in the sides and lid with a sharp knife or hole cutter, and says to leave at least 1/2 inch uncut around corners to keep the lantern strong. Once the lantern is leather hard it softens the edges with a rubber scrubber or a slightly damp sponge, then lets it dry slowly and completely. It says not to glaze the inside of the lid or edges that will touch, and not to fire with the lid on the lantern or they will stick together. It does not name a light source for the finished lantern.
- Making Pottery Without a Wheel: A Guide to Wheel-Free Pottery Techniques — Clay King (ceramics supplier). Pinch pots, air-dry clay, and firing sections. Supports: Hand building shapes clay with hands and simple tools; the only requirement for pinch pots is the clay. Firing to bisque and again after glazing is essential for kiln clay, owning a kiln is often not feasible at first, and community studios or kiln rentals are alternatives. Air-dry clay needs no kiln but is not waterproof or food-safe.
- DAS White — F.I.L.A. (Fabbrica Italiana Lapis ed Affini). Product description and format list (UK English page). Supports: FILA says DAS hardens on exposure to air without baking and can be moulded into solid, durable objects decorated with paints or multi-surface markers. It names bas-reliefs, sculptures, mosaics, and coating wood, metal, or glass as uses. Blocks are listed from 150 g to 1 kg. The page gives no drying time and no age label.
- Product Information — Creative Paperclay Co., Inc. Comparison table, Creative Paperclay column. Supports: For Creative Paperclay the table lists sizes of 4 oz, 8 oz, and 16 oz, natural white color, a fresh texture with short fine pulp fibers, approximately 5% shrinkage when dried, high durability, and a hard dried finish.
- Frequently Asked Questions — Creative Paperclay Co., Inc. Drying time, painting, sealing, and non-toxic answers. Supports: The FAQ says small, thin pieces may dry overnight while larger or thicker projects may take several days, and humidity can lengthen drying. It says a wide range of paints can be used and recommends spray lacquers or brush-on varnish. All its modeling materials carry the ACMI AP non-toxic seal; the FAQ gives no age label.
- Answers to 10 common air dry clay questions — Mont Marte (air dry clay manufacturer), FAQ, 09 Oct 2026. Answers 4, 5, 6, 8, 9 and 10. Supports: Mont Marte says air dry clay is not suitable for direct contact with an open flame or high heat, and that for a lantern or candle holder you should use a battery-operated LED tea light rather than a real candle, shaping the holder around the size of the LED light. It says the clay reaches earthenware hardness in around 24 hours depending on thickness, thicker pieces take longer, and you should wait until it is completely dry before painting. To limit cracks it says to dry gradually at room temperature away from direct heat or sunlight and keep thickness consistent. It says acrylic paint works well once the piece is completely dry. It says air dry clay is not food safe and should not be baked in an oven or kiln. This is one maker's advice for its own clay.
- 14 air dry clay techniques — Mont Marte (air dry clay manufacturer), Tips & Techniques, 03 Mar 2022. Slab building, slip, gluing, drying and bulking. Supports: Mont Marte says to roll air dry clay to an even thickness for a strong slab, that slip made from clay and water acts as a glue, and that small pieces pressed on may fall off once the clay dries, so craft glue can secure them. It says air dry clay typically takes 24 to 48 hours to dry, suggests flipping the piece at about 24 hours so it dries evenly, and warns against sun, a hairdryer or an oven. It says foil or polystyrene can bulk out a sculpture. This is one maker's advice for its own clay.
- How to: fix cracks in air drying clay — Mont Marte (air dry clay manufacturer), Projects & How-to, 19 Aug 2021. Why does air dry clay crack?; How to fix cracks in air dry clay; How to keep air dry clay from cracking. Supports: Mont Marte says air dry clay cracks because it shrinks as its water evaporates, and that cracks are common. To fix one, it says to moisten the area with a little water (fingertips or a wet taklon brush), press in a small piece of fresh clay, smooth it with a wet brush, and let the piece dry completely. To prevent cracks, it advises letting the piece dry completely and evenly, turning it partway through drying or using a cake-style drying rack, and not making the clay too thin, aiming for about 1 cm. This is a manufacturer's how-to for air dry clay, not guidance for kiln-fired clay, and it was not tested for this site.
- Cookie Cutter Ornaments — Mayco (glaze maker), project page. Supplies, building steps and glazing steps. Supports: Mayco's project rolls red or white earthenware clay to about 1/4 to 1/2 inch thick, presses a texture into it, cuts the shape with a cookie cutter, uses a straw to cut the hole to hang it from, and says to allow it to dry completely before the first firing. For glazing it applies 2 to 3 coats for design work, or 1 coat wiped back with a damp sponge for texture, then stilts the piece and glaze fires it (the page lists cone 04 for the first firing and cone 06 for the glaze firing). It does not say whether to glaze the back. This is one maker's project, not a test run for this site.
- Flat Tiles The Easy Way (Laura Reutter) — Ceramic Arts Network Daily (Laura Reutter, originally in Pottery Making Illustrated). Her method for rolling, trimming and drying tiles. Supports: Reutter rolls clay slabs directly onto a piece of drywall, using wooden spacers or dowels beneath the rolling pin for the thickness, and says not to move, lift or turn the slabs once rolled, because moved clay's plastic memory may make it warp, bend or curl during drying and firing. She likes her clay on the dry, stiff side, since too much water makes it dry slowly and promotes warping. She leaves the wet tiles on the drywall for 8 to 12 hours, saying drywall sucks a lot of water out of the clay so the tiles stiffen, then puts each trimmed tile on a rigid metal rack, where air circulates on all sides so it dries evenly without warping. She mentions sandwiching, flipping and weighting only as methods she read about. Her subject is tiles, not ornaments.
- ART 3061 Ceramics 1, Assignment - Glazing (Michael T. Schmidt) — Valdosta State University (ART 3061 Ceramics 1 course handout). Basic Steps in Glazing, steps 2 and 4. Supports: The handout says to leave at least 1/4 to 1/2 inch unglazed at the foot of a form, because glazes can run when melted in the firing, and to increase that margin when glazes overlap. It says any surface the work touches should not be glazed, including kiln shelves, kiln furniture and the seat of a lid, because the glaze melts in the firing and sticks to that surface. It is a course handout for that studio, not a firing schedule.
- How to Hang & Stilt Flat Ornaments on a Rod without Bending the Rod — Gare (ceramics supplier), one-page guide. Whole sheet (photos and captions). Supports: Gare's sheet shows flat ornaments hung on a rod between two kiln posts for firing, says to balance them toward each side or add a post in the centre of a 10 inch rod, and says it is best to kiln wash the rods and to clean out the ornament's hole after it is dipped in clear glaze so the glaze doesn't melt onto the rod. It gives no firing temperature.
- Handmade Holiday Ornaments (Carol Harris) — Pottery Making Illustrated, July/August 2023 (Carol Harris), Ceramic Arts Network. Texture slabs, drying, and glaze firing steps. Supports: Harris rolls thin slabs with dowels, cuts circles with a metal cutter or a paper template, and dries her large texture slabs slowly between two sheets of drywall board to alleviate warping. Her finished hollow ornaments dry freely on a wire rack. For the glaze firing she hangs the ornaments on a bead bar resting across two kiln posts, using high-temperature wire hangers, so they don't touch the shelf. Her ornaments are hollow, made from two curved halves, not flat cut-outs.
- Air Dry Clay Ornament — Crayola, DIY crafts page. Project steps 1 to 6. Supports: Crayola's project rolls air dry clay out on wax paper to about 1/2 inch thick, cuts the ornament shape with a cookie cutter, uses a straw to make a hole close to the top, dries it overnight, paints it with watercolors when dry, and adds glitter glue accents. It gives no sealing step. This is one maker's craft project for its own clay.
- DAS Vernidas Professional — F.I.L.A. (Fabbrica Italiana Lapis ed Affini). Product description (UK English page). Supports: FILA describes VerniDAS Professional as a transparent, protective varnish with a special gloss effect, ideal for items made from DAS and suitable for all surfaces. It says the varnish is solvent based and dries in about 2 hours, and that the bottle has a safety cap. This is the maker's product description, not a test for this site.
- Lime Pop (Jeff Zamek) — Ceramic Industry (Jeff Zamek, ceramics consultant), 16 December 2009. Causes of lime pop and plaster as a source. Supports: Zamek says limestone contamination in moist clay comes most frequently from plaster wedging tables or plaster bats, since plaster is composed of lime, gypsum and water, and that moist clay can grab particles from a weakened plaster surface. He says lime pop occurs when moisture in the air reaches a lime nodule in the fired clay body and makes it expand, leaving a semi-elliptical crack in bisque or high-temperature ware, and that this can happen as the piece comes out of the kiln or years later. He suggests stapling canvas over a plaster wedging board. He does not mention drywall.