Halloween · seasonal project
Clay & Forming · How-to
Clay Jack-o'-Lantern: Make a Pumpkin from Two Pinch Pots
15 min read
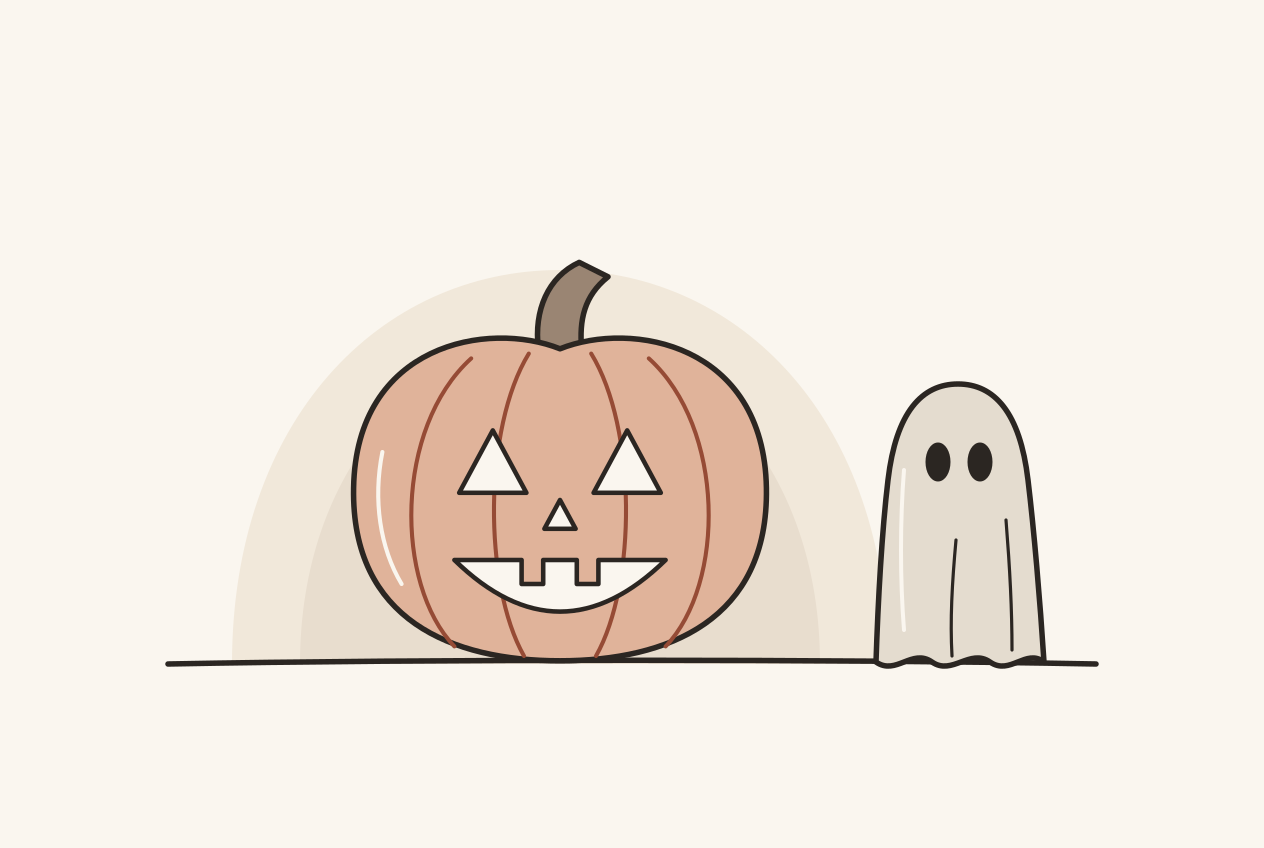
A small clay jack-o’-lantern starts as two pinch pots. Pinch a deep bowl for the top and a shallow bowl for the bottom, with rims the same size, join them rim to rim into a hollow ball while they are still flexible, press in the ribs and add a stem, then cut a lid around the stem and the face once the clay is leather-hard. Drop an LED tea light in through the lid and the face glows.
We know it’s late in the season. Our pumpkin and ghost totally won’t be ready in time for this Halloween, but it’s a cute night in the studio to get into the spooky-season mood, and we’ll definitely be decorating the house with them next fall.
We’ve tried kurinuki, and for a pumpkin we suggest two pinch pots instead. Our pumpkin isn’t made yet, so the steps below come from the sources listed at the end of the page: a double pinch pot sheet by the ceramicist Sam Andrew for the Crafts Council, the University of the Pacific’s ceramics course, Ceramic Arts Network articles, and two lantern projects from the clay maker AMACO, plus general studio practice where we say so.
Short answer
How do you make a clay jack-o'-lantern from pinch pots?
- Pinch two pots with matching rims: a deep bowl for the top and a shallow one for the bottom, each with an even wall about ¼ inch (6 mm) thick. For the 9 cm pumpkin, start with about 260 g of clay for the top and 90 g for the bottom.
- Join them into a ball while they are still flexible: score and slip both rims, press them together, and work the seam closed. Because the bottom bowl is shallow, the seam sits low, below the face.
- Shape it straight away: tap it round, press in the ribs from top to bottom, add a short stem, and poke a small air hole on the lid line.
- Cut at leather-hard, lid first: cut a lid about 55 mm across around the stem, angling the knife inward, then trace our free face template and cut the face with a craft knife, keeping cuts about 1 cm from the seam and from each other.
- Dry it slowly, under plastic at first, until it is completely dry.
Then your studio bisque fires it, you glaze it, and an LED tea light goes in through the lid. The finished pumpkin is 8, 9 or 10 cm tall including the stem, and about the same width.
Why two pinch pots
A few practical reasons, from the sources:
- It starts hollow. Each pinch pot is already a bowl, so joining two gives you a hollow ball with no scooping out.
- The wall is under your fingers the whole time. The University of the Pacific course pinches to an even wall of roughly ¼ inch, and warns that uneven pinching gives lopsided or weak forms. You can feel the thickness as you go.
- The closed ball holds its shape while you press the ribs. Erika Novak, writing for Ceramic Arts Network, says the air trapped in a closed form supports the clay, so you can press on it harder than you could an open pot.
What you need
- Clay from your studio: for the 9 cm pumpkin, about 260 g for the top half and 90 g for the bottom, so about 350 g in all. The template gives the figures for the 8 and 10 cm sizes too.
- A craft knife or fettling knife, for cutting the openings.
- A needle tool, for scoring, the air hole and tracing the lid and face.
- A fork or scoring tool, and a little slip or slurry (clay mixed with water to a paste).
- A flat wooden stick or paddle, and a wooden modeling tool with a blunt edge for the ribs.
- A small sponge. You can cut your own from a car sponge.
- The printed face template, set to the size you want: 8, 9 or 10 cm tall including the stem.
- A sheet of plastic for drying.
- An LED tea light, for the end.
Our beginner pottery tools page covers what each of these tools does.
How big to make it
We suggest a finished pumpkin 8, 9 or 10 cm tall including the stem, and about the same width. That is big enough to sit over a tea light and small enough to pinch each half in your hands. The template comes in those three sizes and is drawn at the larger building size, so the fired pumpkin comes out at the size you picked.
The two halves are not the same size. Their rims match, about 90 mm across for the 9 cm pumpkin, but the top half is a deep bowl, about 71 mm deep, and the bottom half is a shallow one, about 18 mm deep. That puts the seam low on the pumpkin, below the face. The seam is the weakest line on the pumpkin, and with it down there, no face cut comes within about 1 cm of it. The lid goes in the top, around the stem, and the bottom stays closed.
For the 9 cm pumpkin, start with about 260 g of clay for the top half (a ball about 62 mm across) and 90 g for the bottom (about 43 mm). The template works out about 230 g and 80 g for an even wall all the way round; most beginners pinch less evenly than that, so a little extra clay gives you room. It is easier to pinch off spare clay than to add it. The 8 cm size starts with about 200 g and 70 g, the 10 cm size about 320 g and 120 g.
Clay shrinks as it dries and again as it fires. Tony Hansen of Digitalfire gives one example where the total comes to 12.5%, but every clay is different, so check your clay’s product sheet or measure its shrinkage yourself. That matters most for the lid, because the tea light goes in through it. A typical LED tea light is about 38 to 40 mm across, so cut the lid about 55 mm across while the clay is still unfired. It fires to about 48 mm, and the inward-angled cut makes the opening underneath a few millimetres narrower, which still leaves room for the light.
1. Pinch a deep pot and a shallow pot

Roll each ball smooth, push your thumb into the middle, and pinch the wall between your thumb and fingers while you turn the ball in your hand, working from the bottom up. The University of the Pacific course pinches until the wall is roughly ¼ inch thick, with light, even pressure. Andrew aims for an even wall with the rim left slightly thicker, and says to make both pots the same diameter so the rims meet. His two pots are equal; ours differ in depth only. Pinch the bigger ball into a deep bowl for the top, letting the wall curve in a little toward the rim, and the smaller ball into a shallow bowl for the bottom. Keep pinching until both rims are the same size, about 90 mm across for the 9 cm pumpkin. The template has a circle to check them against.
Hold the two bowls rim to rim now and then as you go. It is easier to fix a size difference while the clay is soft.
2. Let them firm up a little
Don’t join them while they are sticky. Andrew says the pots should be flexible but not sticky before joining. Carol Harris, writing for Ceramic Arts Network, waits until her two halves can be handled without losing their shape.
So join as soon as the halves hold their shape and are no longer sticky, while they are still flexible. Don’t wait until they are leather-hard: you still need to press the ribs into the closed ball, and that needs soft clay. Both halves should be at the same stage, so keep them under the same cover while they firm up.
3. Join them into a hollow ball
Score both rims, add a little slip or slurry, and press the rims together. Andrew calls this the most crucial step: he pushes a little clay from one rim over onto the other with a finger, all the way round. Harris compresses the joined edge with her fingers and smooths the seam with a rubber rib.
The University of the Pacific course says to score and slip every connecting surface for a strong bond. Pressing alone isn’t enough; our page on why handbuilt joins separate explains why.
Then tap the ball gently all over with your flat stick. Andrew does this to compress and reinforce the join and to round the form out. Tap the bottom on the table so the pumpkin sits flat.
4. Shape the ribs and the stem straight away
Press the ribs as soon as the ball is closed, while the clay is still flexible. Press shallow grooves from the top down to the bottom with the edge of a wooden tool or the side of your finger. This is when the trapped air helps: Novak says it supports the clay, so the wall pushes back instead of caving in. Uneven ribs still look like a pumpkin.
For the stem, roll a short, thick piece of clay. Score and slip both the stem and the top of the pumpkin, press it on, and blend the edge down into the body. Keep it chunky. A solid stem about 13 mm thick is fine as long as it is well blended in; once the lid is cut, you can also prick into the stem from underneath the lid with your needle tool. A stem is a small part sticking out from the body, like a handle on a mug, and Hansen recommends wrapping handles while they dry so they keep pace with the body.
5. Give the air a way out
When the shape is done, poke a small hole with your needle tool on the lid line, next to the stem, where the lid cut will later open it up. Novak pokes an air hole in her closed form before wrapping it, and Harris pierces a pinhole in her hollow ornaments so air can escape as they dry and shrink.
The University of the Pacific course says a completely sealed sphere needs a small vent hole so it doesn’t burst during firing. Sue McLeod, writing in Ceramics Monthly, explains that it is trapped water, not air, that makes pieces explode. Enclosed air can stop the inside drying fully, and an opening lets dry air reach it. On this pumpkin the lid and the face will do that job once they are cut, so the bottom can stay closed. The early hole covers the time before then.
Cover the pumpkin loosely and let it firm up to leather-hard before you cut anything.
6. Cut the lid, then the face, at leather-hard
AMACO’s Halloween lantern waits until the clay is leather-hard before cutting the face. The University of the Pacific course says leather-hard is the best stage for carving, when the clay is firm but still workable, and that carving dry clay can crack or chip it. Hansen says leather-hard is when pieces are trimmed and fettled most easily.
Use a sharp craft knife or fettling knife. It cuts a cleaner edge than a needle tool, which tends to drag the clay.
The lid comes first. Cut out the full-size lid circle from the template, centre it on the stem, and trace around it with a needle tool; it passes through the air hole. Cut along the line with the knife angled inward, toward the middle of the pumpkin, so the lid comes out wider at the top than at the bottom. It then sits on a little ledge instead of dropping in, and the stem becomes its handle. Lift it off and set it aside under plastic. With the top open, you can put a finger inside to support the wall while you cut the face. This lid step is general studio practice rather than something from the sources above.
Then the face. Print the free face template at the size you chose and cut out the face you like. Hold the paper against the pumpkin and trace around the eyes, nose and mouth with a needle tool. Then cut along the lines slowly with the knife, held straight into the wall, with a finger inside behind the cut.
A few things help:
- Stay clear of the seam. Keep every cut at least about 1 cm away from the seam where the two halves join. The join is the weakest line on the pumpkin, and a cut through or right beside it can open it up. That is why the seam sits low, below the face: on the template, the whole face sits in the deep top half, at least 1 cm above the seam.
- Leave solid clay between the features. AMACO’s lantern lesson keeps at least ½ inch uncut around its corners so the lantern stays strong. Leave about the same, roughly 1 cm, between the eyes, between the nose and the mouth, and between any cut and the lid.
- Go gently. The University of the Pacific course says to start shallow and deepen gradually so you don’t break through where you don’t mean to, and to keep tools sharp and clean.
- Smooth the edges. AMACO softens cut edges at leather-hard with a slightly damp sponge.
When the face is cut, put the lid straight back and let it dry in place, so the lid and the body shrink together and still fit. AMACO’s lantern lesson says not to glaze the edges of a lid and lantern that touch, and not to fire the lid on the lantern, or they will stick together.
7. Dry it slowly
The cut edges and the stem are thinner than the body and will dry first. Hansen’s rule is that no part of a piece should get far ahead of another, and that evenness matters more than speed. Cover the pumpkin loosely with plastic for the first few days, then open the cover a little at a time. A small extra piece of plastic over the stem helps it keep pace.
AMACO’s lantern lesson says to let the lantern dry slowly and completely. If you made it in a class, the studio may have its own shelf and routine for this. Our notes on why clay cracks while drying go into more detail.
8. Fire and glaze
Larry Camm, writing in Ceramics Monthly, says a successful bisque firing depends on proper drying, and that leftover moisture is what makes greenware blow up. Make sure the pumpkin is completely dry before it goes to the kiln, and tell whoever fires it that it is a hollow form built from two pinch pots. They will decide the firing, and we don’t give firing schedules here.
After the bisque firing, the pumpkin is ready to glaze. You only need to glaze the outside; there is no need to reach inside. AMACO’s own Halloween lantern used its Teacher’s Palette Pumpkin glaze, but Teacher’s Palette is a low-fire glaze: AMACO sells it as a low-fire line and fires that lantern to cone 05. It isn’t for a studio that fires to cone 5 or 6. Your glaze’s label and your studio’s rules come first. Keep glaze off the bottom edge that sits on the kiln shelf; your studio will tell you how far up to wipe it.
For a bright orange at cone 6, Mayco’s Stoneware Gloss Orange Gloss (SW-503) is one option. Mayco lists it at cone 6, where it is a bright, opaque orange gloss, and at cone 10, where the color darkens, so check it against the cone your studio fires to. Glazes look different on different clays, so test it on a scrap first. The pumpkin template page has the same pick.
9. Light it
A battery LED tea light is the simplest choice. It has no flame and you can lift the lid to switch it on and off. One college class we found, at Northeast Wisconsin Technical College, gives each student an LED tea light to light their fired luminary when they pick it up. We haven’t tested how hot a real candle makes a small clay pumpkin, so we don’t recommend one here.
If something goes wrong
- The seam cracks open. The rims were too dry, too wet, or not scored and slipped well enough, or the halves were at different stages. See why handbuilt joins separate.
- The ball collapses when you press the ribs. The clay was too soft, or you pressed before the ball was closed. Let the halves firm up a little longer before joining next time.
- The ribs crack as you press them. The clay had dried too far. Join and press sooner, while the ball is still flexible.
- A crack near the face or stem. Usually a sign that the thin parts dried ahead of the body, or that a cut came too close to the seam or to another feature. Cover the next one sooner and keep cuts about 1 cm apart. See why clay cracks while drying.
- A stem that snaps off. Make it shorter and thicker, score and slip it well, and keep it covered while the pumpkin dries.
- The tea light doesn’t fit. The lid opening shrank more than expected, or the cut was angled in too steeply. Cut the next lid a little wider, or angle the knife less, or measure your clay’s shrinkage first.
- The rims don’t match. Pinch the smaller rim out a little, or close the bigger one in by pinching the wall up, and check both against the template’s rim circle. Don’t make the bottom bowl deeper to catch up; that brings the seam up toward the face.
- One side is thicker than the other. Pinch a little more evenly next time, and feel the wall between your thumb and fingers all the way round before you join.
The other way: carving it (kurinuki)
You can also carve a pumpkin from a solid block. Kurinuki is a Japanese handbuilding method where you cut the outside of a solid block of clay into shape and then hollow out the inside. Eva Champagne, writing for Ceramic Arts Network, says the block has to be larger than the form you want, because you cut the outside away, and that the wall should be as even as you can manage.
Her order is to shape the outside with a wire tool and a fettling knife, leave the piece uncovered until it can be handled without leaving finger marks, then scoop out the inside with a loop tool. She dries kurinuki pieces slowly, under cloth and plastic for a couple of days, then cloth only, then uncovered. Our kurinuki page covers the method in more detail.
Where this page stops
This page doesn’t give firing temperatures, kiln schedules or glaze chemistry. Follow your studio and the maker’s sheets. It doesn’t cover sanding dry clay to fix a thick wall, because that makes dust; Andrew warns that dry clay dust is harmful to breathe, so ask your studio how they handle it. And a jack-o’-lantern is decoration, not a dish.
For a ghost to sit beside your pumpkin, see our clay ghost tealight. If you are taking a class to make this, our guide to your first pottery class covers what to ask. If you would like another pinch-pot project with a template, try our clay dog.
Keep an eye out for our upcoming Christmas templates and articles!
Sources (18)
: Crafts Council (UK), Craft Club tutorial sheet by ceramicist Sam Andrew, University of the Pacific (Jessica Fong, Ceramics course on Humanities LibreTexts), Ceramic Arts Network Daily (Carol Harris, excerpted from Pottery Making Illustrated, July/August 2023) and more
- Double Pinch Pot — Crafts Council (UK), Craft Club tutorial sheet by ceramicist Sam Andrew. Pinching, Joining and Shaping steps, regular-clay note and Potential hazards. Supports: Andrew makes two balls of clay of the same size, pinches each into a pot of the same diameter with an even wall and a slightly thicker rim, and says that before joining the pots may need to firm up: flexible, but not sticky. He scores around both rims with a knife, adds slurry or water, places the pots together, and pushes clay from one rim over onto the other all the way round, calling this the most crucial part. Once joined he taps the form all over with a flat wooden stick to compress and reinforce the join and get it into a round shape, then shapes it. He says carving is done once the clay is leather hard, and warns that dry clay makes harmful dust and pots shouldn't be scraped when bone dry.
- 4.1: Pinching- The Most Ancient Technique — University of the Pacific (Jessica Fong, Ceramics course on Humanities LibreTexts). Pinch pot steps, hollow sphere project and amphora project. Supports: The course says to start from a fist-sized ball of well-wedged clay, press a thumb into the center, and rotate while pinching with equal pressure until the walls are roughly 1/4 inch thick, noting that uneven pinching gives lopsided or weak forms. It says to score and slip all connecting surfaces for a strong bond, to cut a small vent hole if a sphere is completely sealed to prevent explosions during firing, and to let a piece dry slowly before bisque firing. Its hollow sphere project builds two hemispheres from coils, joins them once both are leather-hard by scoring and slipping the edges, and blends the seam inside and out. It does not describe a ghost or a pumpkin.
- How to Make Clay Ornaments — Ceramic Arts Network Daily (Carol Harris, excerpted from Pottery Making Illustrated, July/August 2023). Steps on joining two curved halves into a hollow ornament. Supports: Harris lets two curved halves stiffen to leather hard, until they can be handled without distorting, flattens and scores the rims, joins them with slip or Magic Water, compresses the joined edges with fingers or a pony roller and smooths the seam with a rubber rib. She pierces a small pinhole to let air escape as the ornament dries and shrinks, and puts the piece back in a damp box for a few hours or overnight so the moisture evens out. Her halves are slab circles formed over a sphere, not pinch pots.
- How to Make a Hanging Clay Planter — Ceramic Arts Network Daily (Erika Novak, excerpted from Pottery Making Illustrated, May/June 2024). Steps on refining the closed form and releasing the air. Supports: Novak throws a closed form and says the air trapped inside will support the clay, so you can press on it with more force than you would an open vessel. Once the shape is done she pokes a little air hole in the closed form with a needle tool to release the air, before wrapping it up. Her form is thrown, not pinched.
- Techno File: Air Bubble Myth — Ceramic Arts Network, Ceramics Monthly (Sue McLeod, April 2021). Article text on air, water and explosions in firing. Supports: McLeod says explosions in the kiln have everything to do with trapped water, not air. Enclosed air doesn't cause explosions, but it can prevent thorough drying and trap moisture, which does. Poking a hole promotes more thorough drying before firing by letting dry air circulate. A piece that is completely dry inside and out has no risk of exploding. She warns that pieces should already be fairly dry before a fan goes on them, or they may dry unevenly and crack.
- Leather Hard — Digitalfire, Tony Hansen. Glossary definition and notes on work done at leather hard. Supports: Hansen says leather hardness lies between the soft plastic and bone-dry stages, that pieces can be trimmed and fettled most easily then, that components are attached and slabs assembled at this stage, and that incising designs with sharper tools for more detail is done here. He notes different clays reach this stage at different rates depending on how fast they dry.
- 7.2: Carving and Incising — University of the Pacific (Jessica Fong, Ceramics course on Humanities LibreTexts). Section 7.2 on carving and incising, including tools and tips. Supports: The course text says carving is best done at the leather-hard stage, when the clay is firm but still workable, and that carving dry clay can result in cracks or chips. It suggests loop tools for bold, deep carving and needle tools for fine lines, starting shallow and deepening gradually to avoid breaking through the clay wall, keeping tools sharp and clean, and brushing or sponging away crumbs and smoothing edges after carving. It gives no measurements.
- SpoOOooOky Lanterns using Teacher's Palette Glazes — AMACO (American Art Clay Co.). Tutorial steps for a slab-built Halloween lantern. Supports: AMACO's tutorial builds a slab lantern, lets it reach leather-hard before cutting a spooky face, and glazes it with three coats of Teacher's Palette TP-65 Pumpkin inside and TP-1 Coal Black outside, with a cone 04 bisque and a cone 05 glaze firing for those products. It does not say what light to use inside.
- TP-65 Pumpkin — AMACO (American Art Clay Co.). Product page and its catalog category. Supports: AMACO's shop lists TP-65 Pumpkin under Glazes & Underglazes > Low Fire Glazes > (TP) Teacher's Palette, and describes it as a vivid, opaque orange glaze with a glossy, smooth surface after firing. AMACO's own lantern tutorial glaze-fires it to cone 05.
- Lanterns To Light — AMACO (American Art Clay Co.). Lesson plan steps for a textured slab lantern. Supports: The lesson rolls slabs between 1/4 and 3/4 inch thick, cuts openings in the sides and lid with a sharp knife or hole cutter, and says to leave at least 1/2 inch uncut around corners to keep the lantern strong. Once the lantern is leather hard it softens the edges with a rubber scrubber or a slightly damp sponge, then lets it dry slowly and completely. It says not to glaze the inside of the lid or edges that will touch, and not to fire with the lid on the lantern or they will stick together. It does not name a light source for the finished lantern.
- HH700 Handmade Holidays: Ceramic Luminary — Northeast Wisconsin Technical College, Artisan Center. Class description. Supports: A college workshop listing in which participants handbuild, carve and decorate a ceramic luminary, all skill levels welcome, and each participant receives an LED tea light to illuminate the piece when they pick up the fired work. The listing showed $45 per person and that the class was full.
- Drying Ceramics Without Cracks — Digitalfire, Tony Hansen. Ware shrinks when it dries; Isolate the stage where drying gradients are introduced; Give consideration to each type of piece; Clay is composed of microscopic flat crystals; Conclusion; and the picture notes on mugs, handles and foot rings. Supports: Hansen says it is the unevenness of drying, not its speed, that makes ware crack, and that at no time should any part of a piece be significantly ahead of another. A moisture spread introduced early (for example by an unshielded draft, or ware left out too long after forming) tends to remain, and in one of his examples covering mugs with cloth and plastic after the rims had stiffened did not save them. He recommends covering ware with cloth and plastic, waxing or wrapping handles so they keep pace with the body, slowing fast-drying sections with wax resist or latex at leather-hard, turning bowls over as soon as possible, even wall thickness with bases trimmed to the same thickness as the walls, avoiding sharp concave angles, and compressing the bottoms of wide thrown pieces to reduce drying stress (while saying even thickness and even drying, not compression, are the key). His conclusion: take cracked ware seriously, because a few cracked pieces can reveal a flawed process. The article gives no method for repairing a crack that has already opened. This is a technician's published explanation, not a test run for this site.
- Drying Crack — Digitalfire, Tony Hansen. Glossary text and picture notes on S-cracks, handle joins and large plates. Supports: Hansen says evenness matters more than drying speed and that fast-yet-even drying gives fewer cracks than slow-but-uneven drying. He says drying cracks like to start inside sharp acute angles, so rounding those angles at handle joins while the clay is leather-hard denies a crack a place to start, and that thinner, more even walls, better wedging and more even drying mean fewer cracks in large plates. He says most shrinkage happens as the first water is released, and that when one part dries well ahead of a neighboring part the stiffer part cannot shrink with the softer one. The entry describes S-cracks growing suddenly near the end of drying. It does not explain how to repair a crack that already exists.
- Drying Shrinkage — Digitalfire, Tony Hansen. Opening glossary definition and the total-shrinkage example. Supports: Hansen says clays used in ceramics shrink when they dry because of particle packing as inter-particle water evaporates, and that excessive or uneven shrinkage causes cracks. He says a typical plastic pottery clay shrinks about 6% in drying, that highly plastic bodies can shrink up to about 7.5% before drying cracks become difficult to avoid, and that shrinkage can be reduced to 5% or below before plastic bodies become too difficult to form. He notes dry and fired shrinkage cannot simply be added: in his example 6.25 dry plus 6.66 fired would be 12.9, whereas the actual total shrinkage is 12.5%. This is a technician's published explanation, not a measurement for any one clay and not a test run for this site.
- Techno File: Rapid Bisque Firing — Ceramic Arts Network, Ceramics Monthly (Larry Camm, January 2019). Article text on moisture in greenware and bisque firing. Supports: Camm says successful bisque firing depends on proper drying, that ordinary leftover moisture can be enough to make a pot blow up if it is heated too quickly, that bisque explosions have everything to do with the moisture content of the greenware, and that once the mechanical water has been driven out, steam damage is no longer a concern. He notes many potters use slow bisque schedules as a precaution. The firing schedules he discusses are not repeated on this site.
- SW-503 Orange Gloss — Mayco. Product description and fired descriptions. Supports: Mayco lists Orange Gloss, a Stoneware Gloss glaze sold by the pint, at cone 6, where it describes a highly pigmented bright orange gloss with full opaque coverage, and at cone 10, where the color darkens.
- Kurinuki Curious — Ceramic Arts Network, Pottery Making Illustrated (Eva Champagne, July/August 2020). Article text on clay, block size, firmness, tools, wall thickness and drying. Supports: Champagne describes kurinuki as cutting the outside of a solid block into shape and then hollowing the inside. She says any kind of clay can be used, that the block must be larger than the intended final form because the exterior is cut away, that the clay should be firm enough to hold its shape but still take impressions, and that you leave plenty of thickness at the bottom so the foot can be cut later. She leaves wall thickness to taste but says it should be as even as you can manage. Her drying routine is cloth draped over the piece and covered with plastic for a couple of days, then the plastic off with the cloth left on, then the cloth off for the last of the drying. Tools named: wire tools, a fettling knife, a cheese cutter, a dowel or stick, loop tools, paddles and found objects. She gives no measurements for block size or wall thickness.
- How to Make a Vase Using the Kurinuki Technique — Ceramic Arts Network Daily (Eva Champagne, posted 2026-05-20, first published 2020 in Pottery Making Illustrated). Step-by-step text on shaping, firming up and hollowing. Supports: Champagne shapes the block with a wire tool, a fettling knife and a cheese cutter, starts the interior with a dowel or stick, and scoops clay from the foot and interior with a loop tool. She leaves the piece uncovered until the exterior can be handled without leaving finger impressions before hollowing. She notes that slicing removes much of any pressed-in texture, and advises against overthinking or planning, following leads from the clay instead.